Mobile Point of Sale and Apple Pay
Your mobile Point Of Sale app is gaining popularity and you have started receiving lots of user feedback. Your users appreciate the convenience and rates offered by you. You have offered shiny new contactless credit card readers to your users so that they can accept contactless payments using your app. Well, congratulations! And now, it’s time to make your user experience better by disabling Apple Pay when your app is active.
This is a fairly common scenario with mobile POS applications. When your users use personal devices to run POS apps, it is very likely that they have also enabled Apple Pay on their devices. So, if these users have contactless credit card readers near their devices while accepting payments, then they could be prompted to use Apple Pay on their own device to pay themselves. Here’s some good news for you: Apple has a solution for this annoyance so that you can continue receiving those 5 star reviews from your users!
How to get started
The code for disabling Apple Pay is relatively simple. The longer and less documented part is the process to from start to publishing the app for review. Disabling Apple Pay requires an entitlement from Apple. In this post, we will look at our journey of obtaining an “entitlement” from Apple to disable Apple Pay in our app.
Step 1- Request Entitlement for suppressing Apple Pay
At the time of this writing, an entitlement to disable Apple Pay can be requested by contacting apple-pay-provisioning@apple.com
I wrote to them explaining that we need to disable Apple Pay while our app is in foreground because our app accepts contactless payments using an external reader, and we do not want our merchants to accidentally pay for their customers if the merchants’ phone is close to the reader during payments.
I (almost) patiently waited for about a month for Apple to respond. Finally, after a month of sending my initial email, I reached out to my friend who worked at Apple and copied him on a reminder email asking about the status. A few days later, I got a response to my reminder with the good news that our request was approved and asking me to provide our team and app details.
Step 2- Send details about your team and app
The approval is for the specific use case described in the initial email. As a next step, I was asked to provide the Team ID (found in https://developer.apple.com/account/#/membership)
Step 3- Set entitlements on your profiles
A few days after sending our team IDs, I got the following reply:
The entitlement was granted. Please head to the developer website, login, edit your provisioning profile, select the entitlement from the drop down menu. Then go to Xcode, head to build settings, then ensure you select a provisioning profile for which you added the entitlement on the developer website. Then, within Xcode, ensure you add the entitlement “com…” to the entitlement plist.

Step 4- Add entitlements
After adding the entitlement as explained in the email, I needed to figure out how to add an entitlements file to my project (We do not use any other entitlement)
- A quick option to add an empty entitlements file is to go to the capabilities tab and enable some capability, then remove that capability
- Go to build settings, search for Code Signing Entitlements and set the name of the entitlements file added (removing the capability will reset the Code Signing Entitlements value). The value to be set is the entitlements file name without the .entitlements extension.
- Add row com.apple.developer.passkit.pass-presentation-suppression to the entitlements file and set its value to Boolean, YES

Step 5- Add the Passkit framework to your project
Remember to set it to optional if you expect your code to work on devices that do not have Passkit.

Step 6- Download updated profiles
Ensure that you download the updated profile that has the entitlement so Xcode knows about it.
Step 7- Use the PassKitHelper (or your custom code)
Call requestAutomaticPassPresentationSuppression to suppress Apple Pay. I have published a basic PassKitHelper class on my github repo for reference. The “requestAutomaticPassPresentationSuppression” line will fail till you obtain the entitlement and use the updated profile to run your app.
Good to know
- A Swift Code sample is available on github.
- Once you call requestAutomaticPassPresentationSuppression, iOS ensures that Apple Pay is enabled when your app goes to background and disabled again when the app comes back to foreground.
- Although the PassKitHelper in the code sample has an option to enable Apple Pay, in practical scenarios, you may not need it because of the way iOS handles foreground-background.
- Apple is generous with the use of this entitlement. Once you are approved, you can disable Apple Pay immediately on launching your app, you do not need to code special conditions under which to disable Apple Pay.
- This cannot be implemented in an SDK/framework alone. The entitlement is granted to your Apple Developer profile. So, this needs to be coded at the App level. You could bundle the code in a framework, but the app that uses the framework needs to request the entitlement.
- When the entitlement works, you will be greeted with this message confirming that Apple Pay was indeed disabled. This message is only displayed once per install, the first time when the app disables Apple Pay. Subsequent disables are silent.
- As of Feb 2018, the message displayed when Apple Pay is disabled is not customizable. The message could be a bit confusing to users who use the app to accept Apple Pay payments using contactless card readers, so I have submitted a bug report to Apple to provide a way to change this message. I will update this post when this becomes available.
-
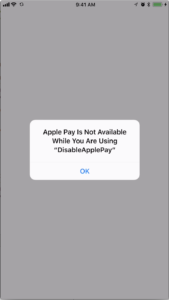
Apple Pay Not Available message

I hope you were able to find some useful information in this post. I would love to hear about the scenarios in which your apps disable Apple Pay. Any feedback on the code or the process described will also be appreciated!
PayPal is hiring now! Check out these jobs.